
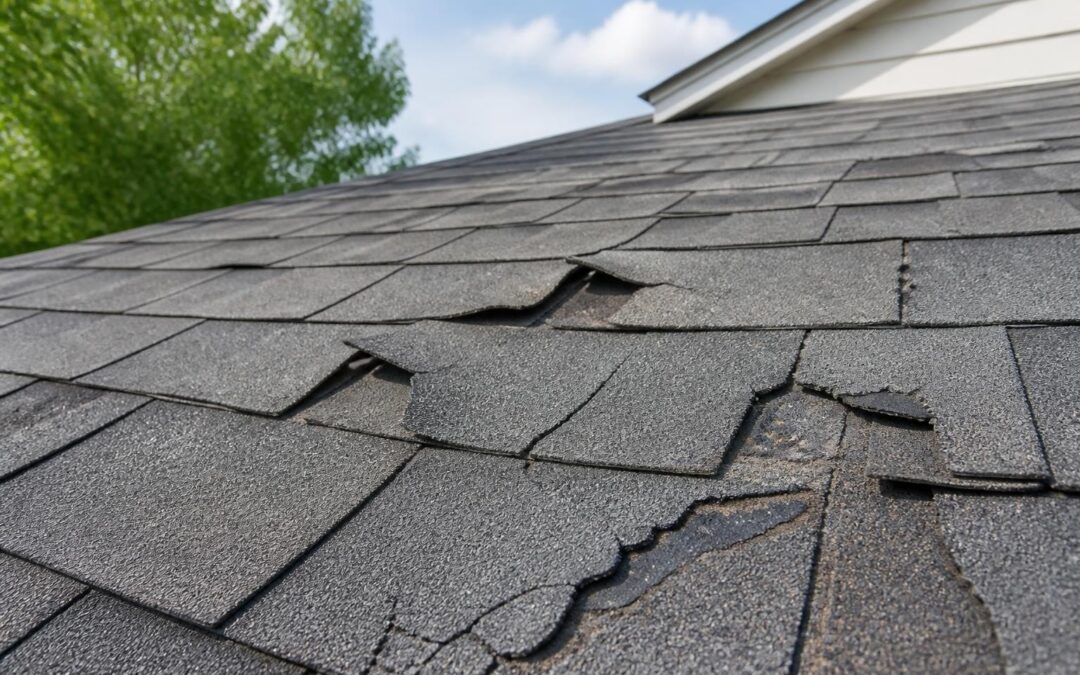
Your roof works tirelessly to protect your home from Los Angeles's harsh sun, occasional rain, and windstorms. When shingles become damaged, immediate attention prevents minor issues from escalating into costly water damage and structural problems. Understanding shingle repair fundamentals empowers homeowners to make informed decisions about maintaining their most important investment. Whether you're dealing with a few loose shingles after a windstorm or discovering damage during routine inspection, knowing the proper repair approach saves time, money, and extends your roof's lifespan.
Understanding Common Shingle Damage Types
Asphalt shingles face numerous environmental challenges that lead to deterioration over time. The intense California sun causes thermal expansion and contraction, which weakens adhesive bonds and makes shingles brittle. Wind events lift shingle edges, breaking the seal and potentially tearing tabs completely off the roof deck.
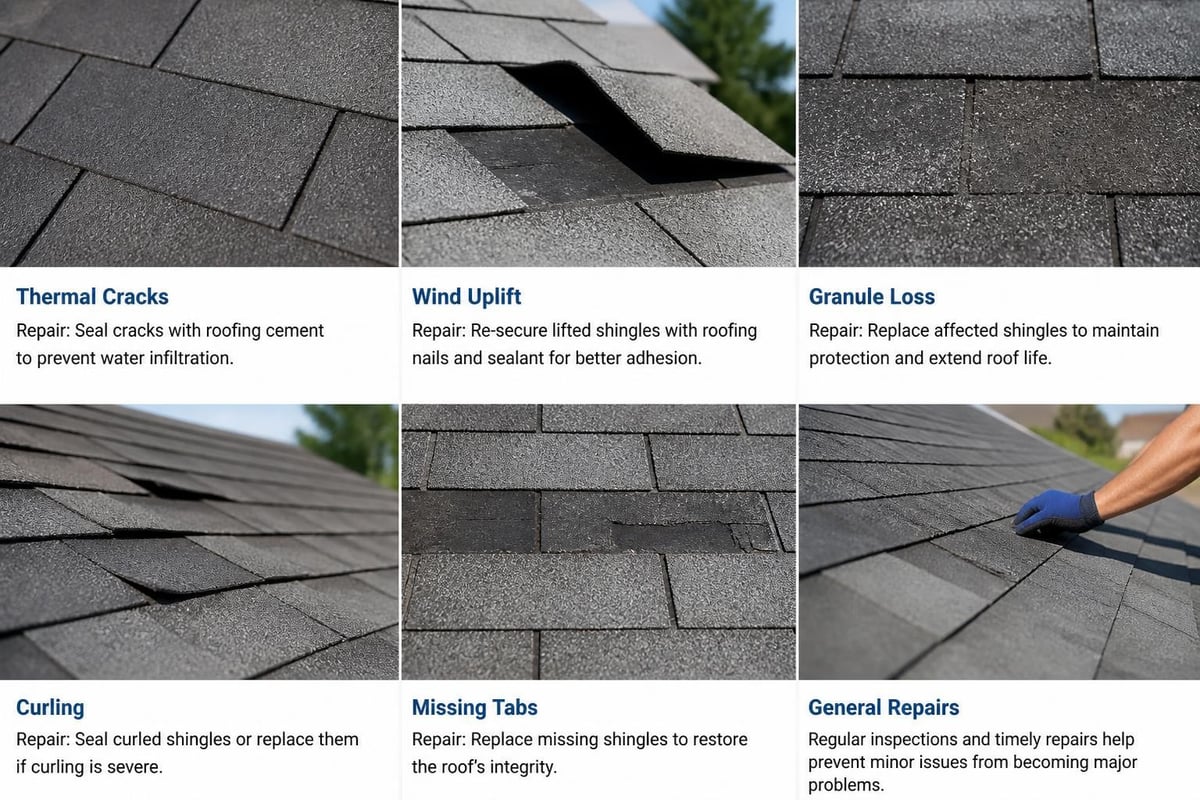
The most frequent damage patterns include:
- Cracked or split shingles from thermal stress and age
- Missing shingles or tabs torn away by wind
- Curled edges that allow water infiltration
- Granule loss exposing the underlying asphalt layer
- Punctures from falling branches or hail impact
- Lifted or unsealed shingles creating vulnerable entry points
Each damage type requires a specific repair approach. Cracked shingles often need complete replacement rather than patching, while lifted shingles may simply require re-sealing with roofing cement. According to This Old House’s repair guide, proper assessment determines whether spot repairs suffice or if broader intervention becomes necessary.
Weather-Related Damage Indicators
Los Angeles experiences unique weather patterns that impact roofing materials differently than other regions. Santa Ana winds create uplift forces that test shingle adhesion, while prolonged UV exposure degrades petroleum-based asphalt compounds. Temperature swings between cool evenings and hot days accelerate aging.
| Damage Type | Primary Cause | Urgency Level | Repair Complexity |
|---|---|---|---|
| Missing Shingles | Wind Events | High | Moderate |
| Granule Loss | UV Exposure | Medium | Variable |
| Thermal Cracks | Temperature Cycling | Medium | Moderate |
| Curling Edges | Age/Heat | Medium | Low to Moderate |
| Storm Punctures | Impact Damage | High | Moderate to High |
Identifying damage early prevents water from reaching the underlayment and decking. Even small breaches allow moisture penetration that leads to rot, mold growth, and interior ceiling damage.
Essential Tools and Materials for Shingle Repair
Professional-quality repairs require proper equipment and materials. Attempting shingle repair with inadequate tools often results in additional damage or incomplete fixes that fail during the next weather event.
Safety Equipment Requirements
Working on roofs presents serious fall hazards. Never attempt repairs without appropriate safety measures in place. A stable ladder with standoff stabilizers prevents gutter damage and provides secure access. Roof anchors and harness systems become essential on steep pitches exceeding 6:12 slope ratios.
Necessary safety gear includes:
- OSHA-approved fall protection harness and rope
- Non-slip roofing shoes with rubber soles
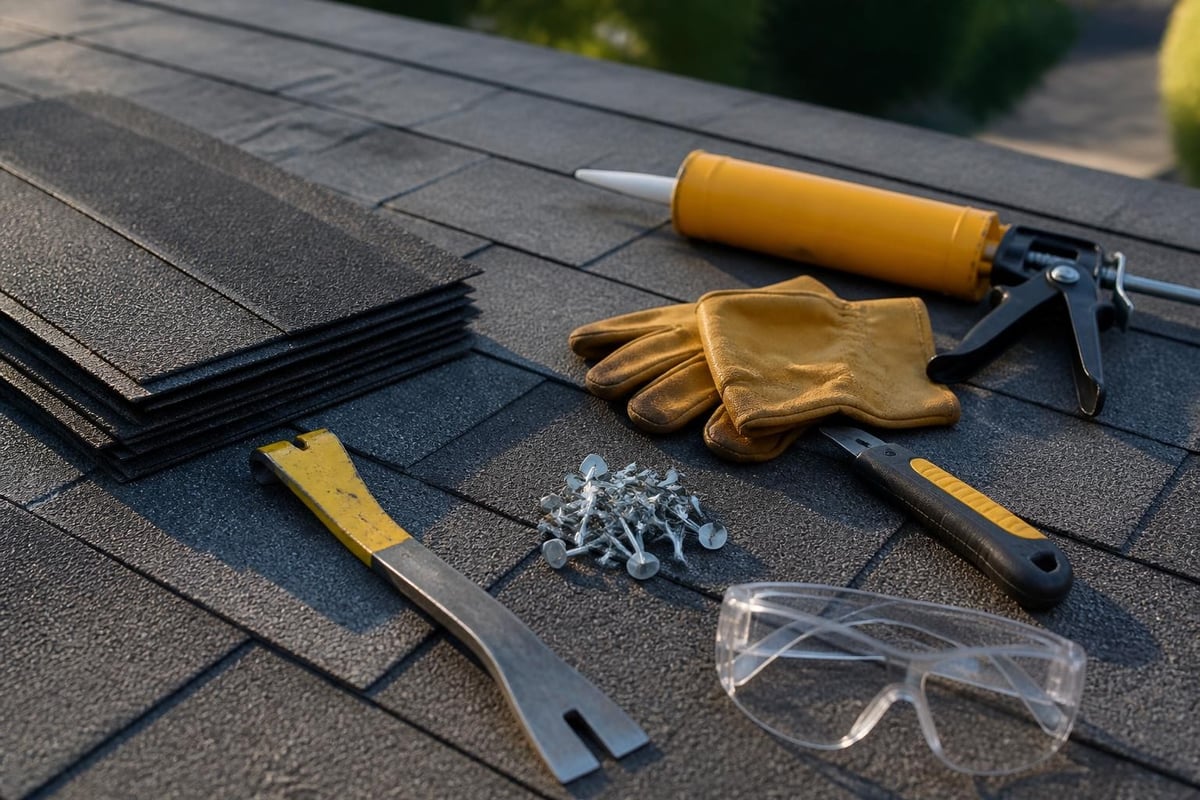
- Safety glasses to protect from debris
- Work gloves for handling sharp materials
- Hard hat in areas with overhanging branches
The importance of safety equipment cannot be overstated. Professional roofers understand that shortcuts lead to accidents, which is why established companies maintain strict safety protocols for every job.
Repair Materials Checklist
Quality materials ensure repairs last for years rather than months. Matching existing shingles maintains aesthetic consistency and ensures compatible expansion rates. Most manufacturers offer replacement shingles for current and recently discontinued product lines.
Your repair kit should contain replacement shingles matching your roof's color and style, roofing cement or sealant formulated for your climate, galvanized roofing nails with adequate length for proper penetration, pry bar or shingle removal tool, utility knife with hook blades, and caulking gun for applying sealants.
Step-by-Step Shingle Repair Process
Successful shingle repair follows a systematic approach that addresses both visible damage and underlying vulnerabilities. Rushing through steps or skipping preparation leads to inadequate repairs that fail prematurely.
Damage Assessment and Preparation
Begin by examining the affected area from ground level using binoculars. Note all visible damage locations and photograph them for reference. Bob Vila’s leaking roof repair tips emphasize thorough inspection before starting work, as interior water stains often appear far from the actual leak source.
Once you've identified all damaged areas, choose appropriate weather conditions for repairs. Shingles become brittle in cold temperatures below 50°F and overly soft above 85°F. Early morning or late afternoon provides optimal working conditions in Los Angeles's climate.
Clear the work area of debris, ensuring clean surfaces for proper adhesion. Remove loose granules, dirt, and organic matter from around damaged shingles. Establish safe roof access and set up fall protection systems before carrying materials onto the roof.
Removing Damaged Shingles
The removal process varies based on shingle type and damage extent. Three-tab shingles differ from architectural shingles in thickness and layering patterns. Understanding your roof's configuration prevents unnecessary removal of undamaged materials.
- Carefully lift the shingle tabs in the row above the damaged section
- Remove roofing nails holding the damaged shingle using a pry bar
- Extract nails from the overlapping shingle above that penetrate the damaged piece
- Slide out the damaged shingle once all fasteners are removed
- Inspect the underlying felt paper or underlayment for damage
- Replace any compromised underlayment before installing new shingles
Kelly Roofing’s seven-step repair process provides detailed guidance on identifying leak sources and executing proper repairs. Their professional approach emphasizes addressing root causes rather than simply covering symptoms.
Installing Replacement Shingles
Proper installation ensures repairs blend seamlessly with existing roofing and withstand future weather challenges. New shingles must integrate into the overlapping pattern that creates water-shedding capability.
Slide the replacement shingle into position, aligning it with adjacent shingles in the same row. The top edge should sit beneath the overlapping row above, while the bottom edge maintains consistent exposure with neighboring shingles. Secure the new shingle with four roofing nails placed just below the adhesive strip, positioned to be covered by the overlapping row above.
Apply roofing cement beneath lifted tabs of surrounding shingles to restore the weatherproof seal. Press firmly to ensure complete adhesion without creating visible bumps. The professional roof shingle repair process outlined by Faircloth Roofing demonstrates how experienced contractors achieve invisible repairs that maintain roof integrity.
For homeowners in Los Angeles and surrounding areas dealing with extensive shingle damage, professional assistance ensures proper repairs that protect your investment. Proof Your Roof's experienced team handles everything from minor repairs to complete replacements, providing thorough assessments and quality workmanship backed by comprehensive warranties. Their expertise with various roofing materials ensures repairs that match your existing roof and stand up to Southern California's unique climate challenges.
Cost Factors and Budgeting for Shingle Repair
Shingle repair costs vary significantly based on damage extent, roof accessibility, material quality, and labor requirements. Understanding these factors helps homeowners budget appropriately and make informed decisions about DIY versus professional repairs.
Material and Labor Cost Breakdown
Individual replacement shingles typically cost between three and eight dollars per square foot for standard asphalt products. Premium architectural shingles or specialty materials increase per-unit costs substantially. Small repair projects requiring fewer than twenty shingles often include minimum service charges from contractors.
Labor rates in the Los Angeles market reflect the region's higher living costs and licensing requirements. Professional roofers charge between seventy-five and one hundred fifty dollars per hour, with most repairs requiring two to four hours depending on complexity and roof pitch.
| Repair Scope | Material Cost | Labor Cost | Total Range |
|---|---|---|---|
| Single Shingle | $5-$15 | $150-$300 | $155-$315 |
| Small Section (10-20 shingles) | $30-$160 | $300-$600 | $330-$760 |
| Medium Repair (50+ shingles) | $150-$400 | $600-$1,200 | $750-$1,600 |
| Large Section | $400-$1,000 | $1,200-$2,500 | $1,600-$3,500 |
Additional costs arise from underlayment replacement, flashing repairs, or structural deck repairs discovered during shingle removal. Always request detailed estimates that itemize all anticipated costs before authorizing work.
DIY Versus Professional Repair Economics
The DIY shingle repair guide from Prime Roofs outlines a six-step process accessible to moderately skilled homeowners. However, economic analysis must consider more than immediate cost savings.
Professional repairs include warranty coverage protecting against installation defects and premature failure. Experienced contractors identify underlying issues that inexperienced homeowners miss, preventing future problems that multiply repair costs. Insurance considerations also factor into the decision, as improper DIY repairs may void coverage or create liability issues.
When DIY makes financial sense:
- Damage involves fewer than five shingles in accessible locations
- You possess proper safety equipment and roofing experience
- Replacement shingles perfectly match existing materials
- Roof pitch remains below 6:12 for safe working conditions
When professionals provide better value:
- Extensive damage requiring systematic replacement across multiple areas
- Steep pitches or difficult access requiring specialized equipment
- Underlying deck or structural damage suspected
- Insurance claims involved requiring professional documentation
- Personal safety concerns or physical limitations exist
Preventive Maintenance to Minimize Future Repairs
Proactive roof maintenance significantly extends shingle lifespan and reduces repair frequency. Los Angeles homeowners who implement regular inspection schedules catch minor issues before they escalate into major problems requiring extensive intervention.
Seasonal Inspection Protocols
Schedule comprehensive roof inspections twice annually, ideally in spring and fall. Spring inspections identify winter storm damage, while fall assessments prepare your roof for seasonal rain. Visual inspection from ground level reveals obvious damage, but close examination requires safe roof access or professional evaluation.
During inspections, examine shingle condition across the entire roof surface. Look for curling edges, missing granules creating dark patches, cracked or broken tabs, lifted corners indicating seal failure, and moss or algae growth in shaded areas. Document findings with dated photographs to track deterioration patterns over time.
Check flashings around chimneys, vents, and skylights for separation or deterioration. These vulnerable transition points often develop leaks before general roof surfaces show problems. Ensure proper caulking remains intact and metal flashings show no rust or separation.
Gutter Maintenance Connection
Many homeowners overlook the critical relationship between gutter function and roof health. Clogged gutters force water to back up under shingle edges, saturating underlayment and causing premature deterioration. Regular gutter cleaning prevents this destructive cycle.
Clean gutters at least twice yearly, removing leaves, debris, and sediment that impede water flow. Ensure downspouts direct water at least five feet away from foundation walls. Inspect gutter hangers for secure attachment, as sagging gutters allow water pooling that compromises roof edges.
Tree Management and Debris Control
Overhanging branches pose multiple threats to shingle integrity. Constant rubbing abrades protective granules, accelerating aging and creating vulnerable spots. Falling branches during storms puncture shingles and damage underlying structures. Dense shade promotes moss growth that lifts shingle edges and retains moisture.
Trim branches maintaining at least six feet of clearance from roof surfaces. Remove dead or weak limbs that pose falling hazards during windstorms. Regular tree maintenance protects your roof investment while preventing emergency repairs after storm events.
When Repair Becomes Insufficient
Extensive shingle damage sometimes indicates broader issues requiring complete replacement rather than continued repairs. Recognizing this transition point prevents wasting money on stopgap measures that delay inevitable comprehensive solutions.
Assessing Repair Versus Replacement Economics
Calculate the cumulative cost of ongoing repairs over the past three years. If annual repair expenses exceed twenty-five percent of replacement costs, full replacement typically provides better long-term value. Consider the roof's age relative to expected lifespan, with most asphalt shingle systems designed for twenty to thirty years depending on quality and maintenance.
Multiple leak locations scattered across the roof surface indicate systemic failure rather than isolated damage. Widespread granule loss creating large bare patches compromises waterproofing capacity beyond repair capabilities. Visible sagging or waviness in the roof plane suggests underlying deck deterioration requiring complete reconstruction.
Insurance Claim Considerations
Storm damage often qualifies for insurance coverage that offsets replacement costs. Document all damage thoroughly with photographs and detailed notes. Contact your insurance provider promptly after discovering damage, as most policies include strict notification deadlines.
Professional inspections provide credible damage assessments that support insurance claims. Contractors experienced in insurance work understand documentation requirements and can advocate for appropriate coverage. Never sign agreements waiving deductibles or guaranteeing claim approval, as these practices violate insurance regulations and may void coverage.
Understanding shingle repair fundamentals empowers homeowners to protect their investment through timely intervention and informed decision-making. Whether addressing minor wind damage or planning comprehensive maintenance programs, proper techniques and quality materials ensure repairs that extend roof lifespan and prevent costly water damage. For Los Angeles area homeowners facing roofing challenges, Proof Your Roof provides expert evaluation, professional repairs, and comprehensive roofing solutions backed by decades of experience serving residential and commercial clients throughout Southern California.