
Skylights bring natural light into living spaces, reduce energy costs, and create an open, airy atmosphere in homes throughout Los Angeles and surrounding areas. However, even the best skylights eventually need replacement due to age, weather damage, or performance issues. Understanding when and how to approach skylight replacement can save homeowners thousands of dollars in energy costs and prevent serious water damage. This comprehensive guide explores the critical aspects of replacing your skylights, from identifying warning signs to selecting energy-efficient models and ensuring proper installation.
Recognizing When Skylights Need Replacement
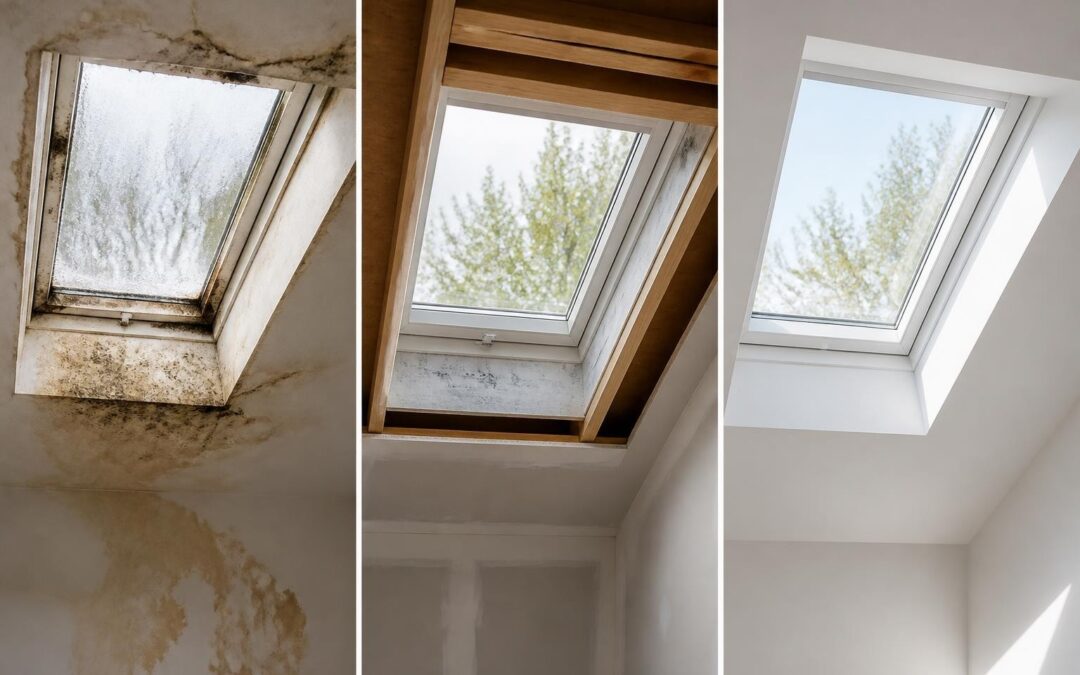
Most homeowners wait too long before addressing skylight problems, leading to expensive structural damage and higher energy bills. Visible condensation between glass panes indicates seal failure and means the insulating value has been compromised. Leaks around the skylight frame during rain or snow suggest flashing deterioration or improper installation from previous work.
Physical Damage Indicators
Cracks in the glazing material create immediate concerns for water intrusion and safety. Even small hairline fractures can expand rapidly under thermal stress and should trigger replacement consideration. Discoloration or yellowing of acrylic domes signals UV degradation that reduces light transmission and structural integrity.
- Frame warping or rot in wooden components
- Cracked or broken glass panes
- Sagging or deformed skylight structure
- Persistent moisture stains on ceiling or walls below
- Visible mold growth around the skylight perimeter
Mechanical components also deteriorate over time. Operators on venting skylights that stick, bind, or fail to close properly allow weather infiltration and compromise security.
Performance and Efficiency Problems
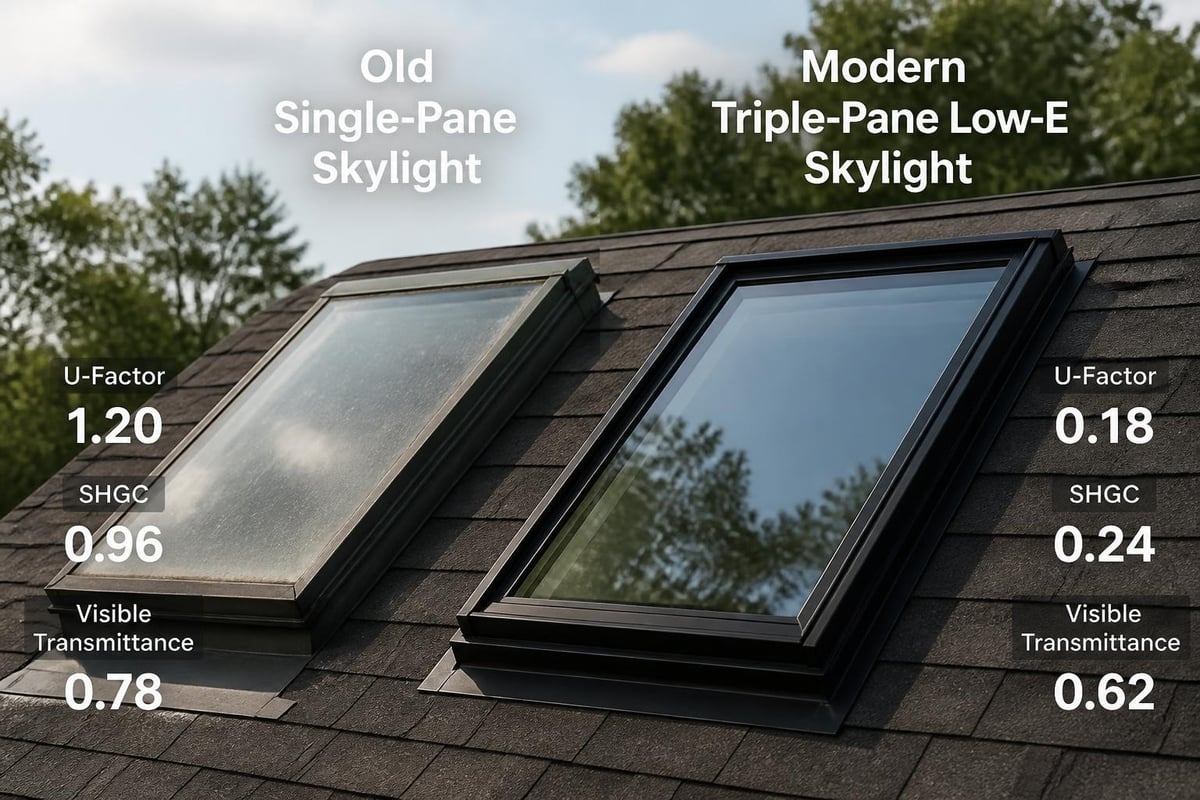
Energy efficiency declines as skylights age. If you notice drafts around the skylight frame during winter or excessive heat gain during Los Angeles summers, the thermal performance has degraded significantly. Modern skylights offer dramatically better insulation values compared to units installed 15 or 20 years ago.
The National Fenestration Rating Council maintains a certified product directory where homeowners can compare energy performance ratings for replacement options. Look for low U-factor ratings (heat transfer) and appropriate Solar Heat Gain Coefficient (SHGC) values for California's climate zones.
Skylight Replacement Cost Factors
Replacement costs vary significantly based on skylight size, type, accessibility, and structural modifications required. Fixed skylights typically cost less to replace than venting or tubular models due to simpler mechanical components. A standard 2-foot by 4-foot fixed skylight replacement in Los Angeles ranges from $800 to $2,500 including labor and materials.
Material and Design Choices
| Skylight Type | Typical Cost Range | Key Benefits |
|---|---|---|
| Fixed acrylic | $300 – $800 | Lightweight, impact-resistant, lower cost |
| Fixed glass | $500 – $1,500 | Superior clarity, longer lifespan, better insulation |
| Venting manual | $700 – $2,000 | Fresh air circulation, moisture control |
| Venting electric | $1,200 – $3,500 | Remote operation, rain sensors, convenience |
| Tubular | $400 – $1,200 | Excellent for small spaces, minimal heat transfer |
Premium features increase costs but deliver long-term value. Low-emissivity (low-E) coatings reduce heat transfer while maintaining light transmission. Laminated glass provides enhanced impact resistance and UV filtering to protect furnishings. Consider your specific needs when evaluating these upgrades during skylight replacement.
Structural modifications substantially affect total project costs. If the existing curb is damaged or built to outdated specifications, complete curb replacement adds $300 to $800. Relocating a skylight to a different roof position requires framing modifications, roof deck repairs, and new flashing systems that can double or triple baseline costs.
Installation Complexity Variables
Roof pitch, height, and accessibility directly impact labor costs. Steep-pitch roofs or third-story installations require additional safety equipment and time. Complex roof geometries with multiple intersecting planes demand custom flashing fabrication and careful waterproofing details. The National Roofing Contractors Association provides technical guidance on proper flashing installation that prevents the most common failure modes.
Los Angeles building codes and permit requirements add administrative costs. Most jurisdictions require permits for skylight replacement, typically ranging from $100 to $300. Professional contractors handle permit applications and ensure code compliance, but homeowners attempting DIY replacement must navigate these requirements independently.
Energy Efficiency Considerations
California's Title 24 energy standards establish minimum performance requirements for fenestration products including skylights. ENERGY STAR certified skylights exceed these baseline requirements and qualify for various utility rebates and tax incentives. Replacement with high-performance units can reduce cooling costs by 15 to 30 percent in sunny climates like Los Angeles.
Climate-Specific Selection Criteria
Southern California's mixed heating and cooling climate requires balanced skylight performance. The U-factor measures how well the skylight insulates against heat loss during cooler months. Look for U-factors of 0.30 or lower for optimal thermal performance. The Solar Heat Gain Coefficient (SHGC) indicates how much solar radiation passes through, with lower values reducing cooling loads during hot summers.
Visible transmittance (VT) measures the percentage of visible light transmitted through the glazing. Higher VT values maximize natural daylighting benefits while minimizing artificial lighting needs. The ideal skylight for Los Angeles combines a VT above 0.50 with an SHGC between 0.25 and 0.35, providing abundant natural light without excessive heat gain.
Condensation resistance ratings predict how well the skylight resists interior condensation formation. Higher ratings (above 50) indicate better performance in preventing moisture problems that lead to mold growth and structural damage.
Professional Installation vs. DIY Replacement
Skylight replacement demands precise waterproofing and structural integration skills. While experienced DIYers can tackle straightforward replacements, most homeowners benefit from professional expertise. Improper flashing installation accounts for approximately 90 percent of skylight leak problems according to roofing industry studies.
Critical Installation Steps
- Remove existing skylight carefully to assess curb and deck condition
- Inspect and repair roof deck, rafters, and surrounding structure
- Install or refurbish the skylight curb with proper slope
- Apply underlayment and ice-water barrier around the opening
- Position new skylight and secure according to manufacturer specifications
- Install step flashing integrated with roofing material
- Apply head flashing and cricket for water diversion
- Seal all penetrations with compatible sealants
- Complete interior finishing and insulation details
- Test for leaks before final approval
VELUX provides detailed replacement resources including measurement worksheets and installation guides that professional contractors reference for proper procedures. These manufacturer specifications ensure warranty coverage and long-term performance.
When evaluating contractor qualifications, verify proper licensing, insurance, and skylight installation experience. Request references from recent skylight replacement projects and inspect completed work when possible. Many roofing contractors offer comprehensive services that address both skylight replacement and surrounding roof maintenance needs. Roof replacement projects often present the ideal opportunity to upgrade skylights simultaneously, coordinating flashing integration and ensuring cohesive weatherproofing systems.
Common Installation Mistakes to Avoid
Incorrect skylight sizing creates unnecessary complications. Measure the existing curb opening precisely rather than relying on the old skylight's stated dimensions. Manufacturing variations and settling can alter actual dimensions. Over-tightening fasteners during installation can crack acrylic domes or stress glass panes, creating immediate failure points.
Mixing incompatible materials causes premature deterioration. Certain sealants react with rubber gaskets or plastic components, breaking down seals within months. Always use manufacturer-specified sealants and flashing materials. Inadequate insulation around the skylight shaft creates thermal bridges that waste energy and promote condensation on interior surfaces.
Selecting the Right Replacement Skylight
Modern skylights incorporate advanced technologies unavailable in older units. Triple-pane glazing with argon or krypton gas fills provides exceptional insulation in climates with significant heating or cooling demands. Impact-resistant laminated glass offers protection against hail damage and enhances home security in accessible locations.
Smart Technology Integration
Contemporary venting skylights integrate with home automation systems for convenient control and enhanced functionality. Rain sensors automatically close skylights when precipitation begins, preventing water intrusion even when homeowners are away. Temperature sensors can trigger venting to reduce cooling loads during optimal weather conditions.
Solar-powered operators eliminate wiring requirements while providing reliable operation. Photovoltaic cells integrated into the skylight frame generate sufficient power for daily operation and maintain battery backup for cloudy periods. These systems offer particular advantages during retrofits where running electrical circuits proves challenging.
| Feature | Standard Skylight | Premium Skylight |
|---|---|---|
| Glazing layers | 2 (double-pane) | 3 (triple-pane) |
| Gas fill | Air | Argon or krypton |
| Low-E coatings | Single layer | Multiple layers |
| U-factor | 0.45 – 0.55 | 0.25 – 0.35 |
| Warranty | 10 years | 20+ years |
| Price premium | Baseline | +40% to +60% |
The U.S. Department of Energy provides guidance on evaluating energy-efficient fenestration products including lifecycle cost analysis tools. These resources help homeowners calculate payback periods for premium skylight investments based on local energy costs and usage patterns.
Skylight Flashing and Waterproofing
Proper flashing integration represents the most critical aspect of successful skylight replacement. The flashing system must create a watertight barrier while accommodating thermal expansion, structural movement, and roof material characteristics. Step flashing along the sides integrates with each course of roofing material, creating a shingled effect that directs water down and away from the opening.
Flashing System Components
The saddle or cricket installed upslope from the skylight diverts water around the opening rather than allowing it to pool against the head flashing. Minimum cricket height should equal one-sixth of the horizontal distance from the skylight to the ridge. Larger skylights or low-slope applications require more aggressive water diversion.
- Pan flashing forms the base and connects to curb sides
- Step flashing integrates with side roofing courses
- Head flashing caps the upper edge and extends under roofing
- Counterflashing covers exterior curb and overlaps base flashing
- Ice and water barrier provides additional protection in valleys
Curb-mounted skylights require careful attention to the curb-to-roof-deck connection. The curb must be elevated sufficiently above the roof surface to prevent water backup during heavy rain or snow melt events. Los Angeles building codes specify minimum curb heights based on roof slope and regional precipitation patterns.
Self-flashing or deck-mounted skylights integrate flashing components into the skylight frame itself, simplifying installation on some roof types. However, these designs prove more challenging to service and may not accommodate all roofing materials effectively. Evaluate your specific roof system before selecting between curb-mounted and deck-mounted replacement options.
Timing Your Skylight Replacement Project
Los Angeles's Mediterranean climate offers an extended window for skylight replacement compared to regions with harsh winters. However, scheduling during the dry season (May through October) minimizes weather-related complications and ensures optimal sealant curing conditions. Monsoon moisture during late summer can disrupt installation schedules and compromise flashing installation.
Coordinating skylight replacement with other roof work maximizes efficiency and reduces costs. If your roof approaches the end of its service life, plan skylight upgrades during the roof replacement project. This coordination eliminates the need to disturb new roofing materials later and ensures integrated flashing systems designed for long-term performance.
Emergency replacements after sudden damage or severe leaks require immediate action regardless of weather. Professional contractors maintain emergency response capabilities and employ temporary weatherproofing measures when installation cannot be completed immediately. Delaying emergency skylight replacement risks extensive interior water damage that far exceeds replacement costs.
Planning and Preparation Requirements
Order custom skylights six to eight weeks before planned installation to ensure availability and avoid project delays. Standard sizes ship more quickly, but custom dimensions for unusual openings require extended manufacturing timelines. Verify all measurements multiple times before placing orders to prevent costly reorders and installation delays.
Schedule interior preparation to protect furnishings and flooring from dust and debris. Skylight replacement generates surprising amounts of particulate matter, especially during old skylight removal and roof deck repairs. Plastic sheeting and careful containment procedures minimize cleanup requirements and prevent damage to finished spaces below the work area.
Maintenance After Replacement
New skylights require minimal maintenance but benefit from periodic inspection and cleaning. Inspect flashing and sealant joints annually, particularly after severe weather events. Look for separated joints, cracked sealants, or displaced flashing components that could allow water infiltration. Address minor issues immediately before they develop into major leak problems.
Clean glazing surfaces twice yearly using appropriate cleaners for the specific material. Avoid abrasive cleaners or tools that scratch acrylic or damage low-E coatings on glass. Remove debris from curb and flashing areas where organic matter can retain moisture and promote deterioration.
Operable skylights require additional attention to mechanical components. Lubricate hinges, operators, and locking mechanisms according to manufacturer specifications. Inspect weatherstripping for compression or damage and replace as needed to maintain proper sealing. Test rain sensors and automated controls seasonally to ensure reliable operation.
Warranty Coverage and Documentation
Maintain complete documentation of your skylight replacement including product specifications, warranty certificates, installation invoices, and maintenance records. Most manufacturers provide warranty coverage ranging from 10 to 20 years for skylight components, with separate coverage periods for glazing, frames, and mechanical elements.
Professional installation typically includes workmanship warranties covering flashing and integration with the roof system. Understand the distinction between product warranties (manufacturer) and installation warranties (contractor) to ensure comprehensive protection. Register products with manufacturers promptly to activate warranty coverage and receive maintenance reminders.
Review warranty terms carefully regarding maintenance requirements and exclusions. Some warranties require periodic professional inspections or specific maintenance procedures to remain valid. Document all service work and inspections to support potential warranty claims in the future.
Building Science and Performance Optimization
Advanced building science principles guide modern skylight replacement approaches. Building Science Corporation research on skylights emphasizes controlling the four critical flows: water, air, vapor, and heat. Each requires specific attention during replacement to achieve optimal long-term performance.
Air-sealing details around the skylight shaft prevent conditioned air loss and reduce energy waste. Spray foam insulation provides effective sealing while accommodating irregular spaces around curbs. However, proper vapor barrier placement prevents condensation within wall and ceiling assemblies in climate zones with heating seasons.
The ASHRAE Handbook on fenestration provides authoritative guidance on thermal performance, condensation resistance, and daylighting optimization. These resources help designers and contractors balance natural light benefits against thermal loads, particularly critical in Los Angeles where cooling demands dominate energy consumption patterns.
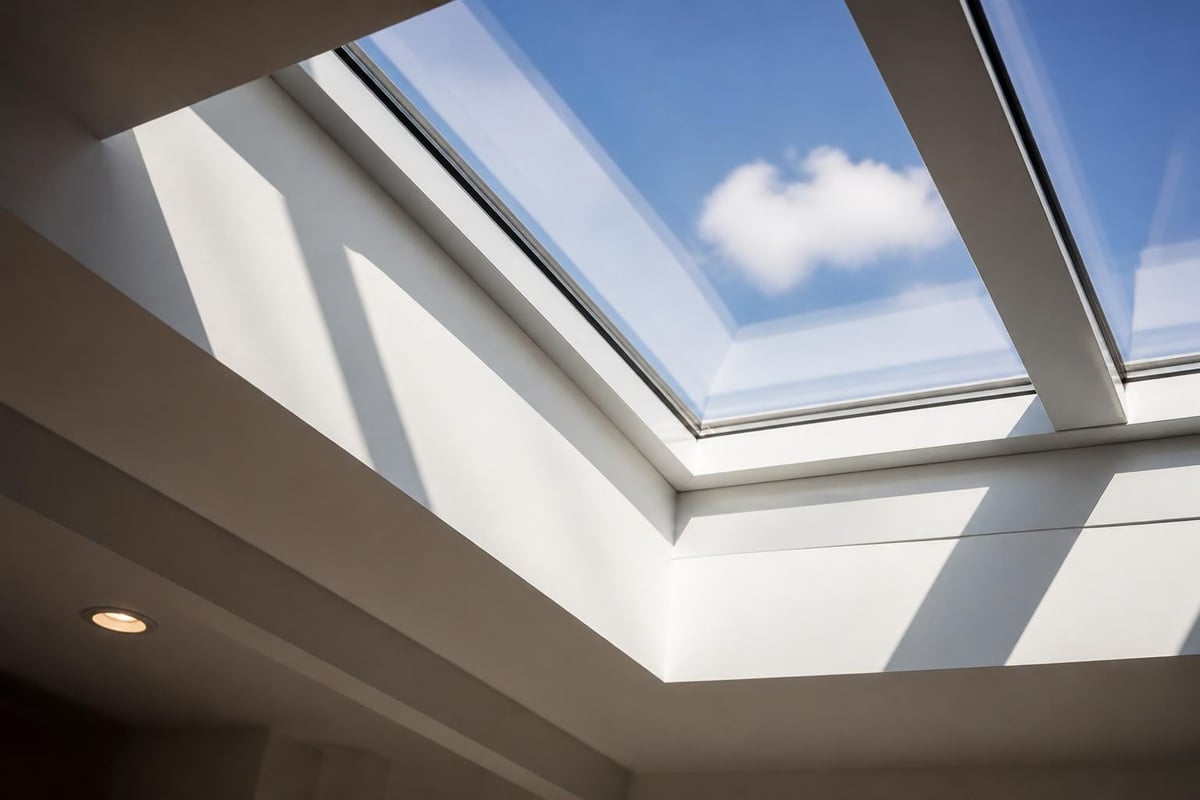
Interior finishes around skylight shafts dramatically affect light distribution and energy performance. Light-colored, reflective surfaces maximize natural light penetration into living spaces while minimizing solar heat absorption. Splayed shaft walls increase the effective light distribution area compared to straight vertical shafts.
Skylight placement relative to ceiling height and room geometry influences daylighting effectiveness. The Fenestration and Glazing Industry Alliance Skylight Selection Guide offers detailed daylighting design principles including recommended skylight-to-floor-area ratios for different space types and uses. Proper sizing prevents over-glazing that wastes energy while ensuring adequate natural illumination.
Successful skylight replacement requires careful planning, quality products, and expert installation to deliver decades of reliable performance and energy savings. Whether you're addressing leaks, upgrading efficiency, or modernizing your home's natural lighting, professional guidance ensures optimal results. Proof Your Roof brings extensive roofing expertise to skylight replacement projects throughout Los Angeles and surrounding areas, coordinating flashing integration with roof systems for lasting weathertight protection and enhanced home comfort.