
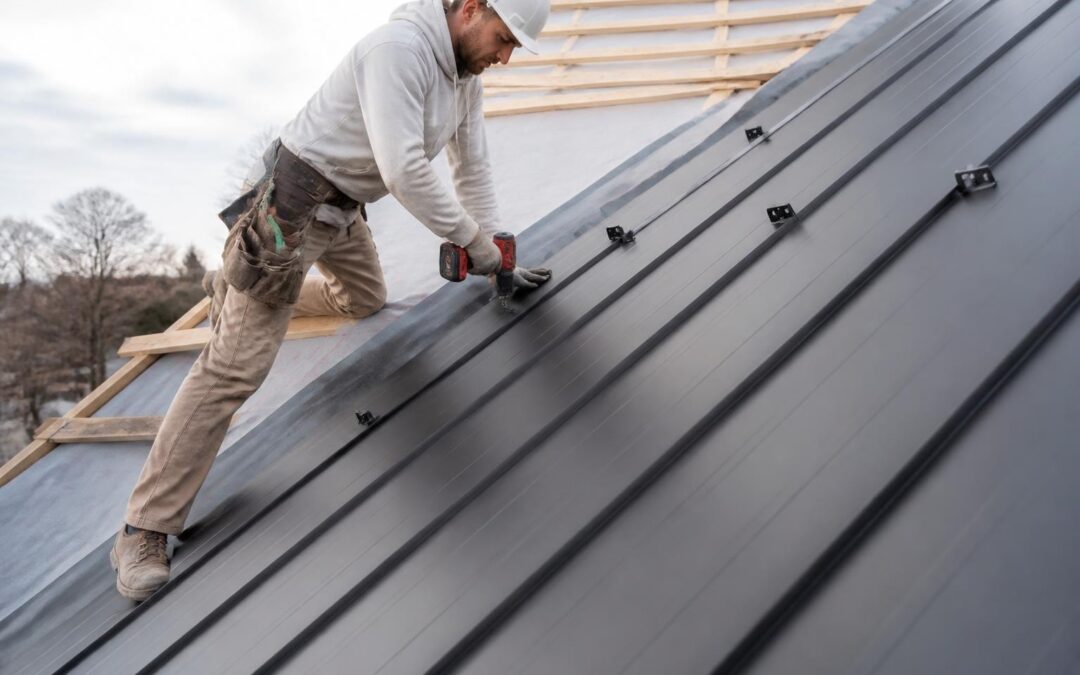
Standing seam metal roofing has become increasingly popular across Los Angeles and the broader construction industry, offering unmatched durability, weather resistance, and architectural appeal for both residential and commercial properties. Unlike traditional roofing systems, standing seam metal roof installation requires specialized knowledge, precision tools, and adherence to manufacturer specifications to ensure proper performance over the system's 40-plus year lifespan. This comprehensive guide explores the critical steps, materials, techniques, and considerations that roofing professionals must understand to execute flawless installations that protect structures and satisfy building codes throughout Southern California and beyond.
Understanding Standing Seam Metal Roof Systems
Standing seam metal roofing distinguishes itself through concealed fasteners and raised vertical seams that interlock adjacent panels. The system eliminates exposed fasteners that penetrate the weathering surface, dramatically reducing potential leak points compared to exposed fastener systems.
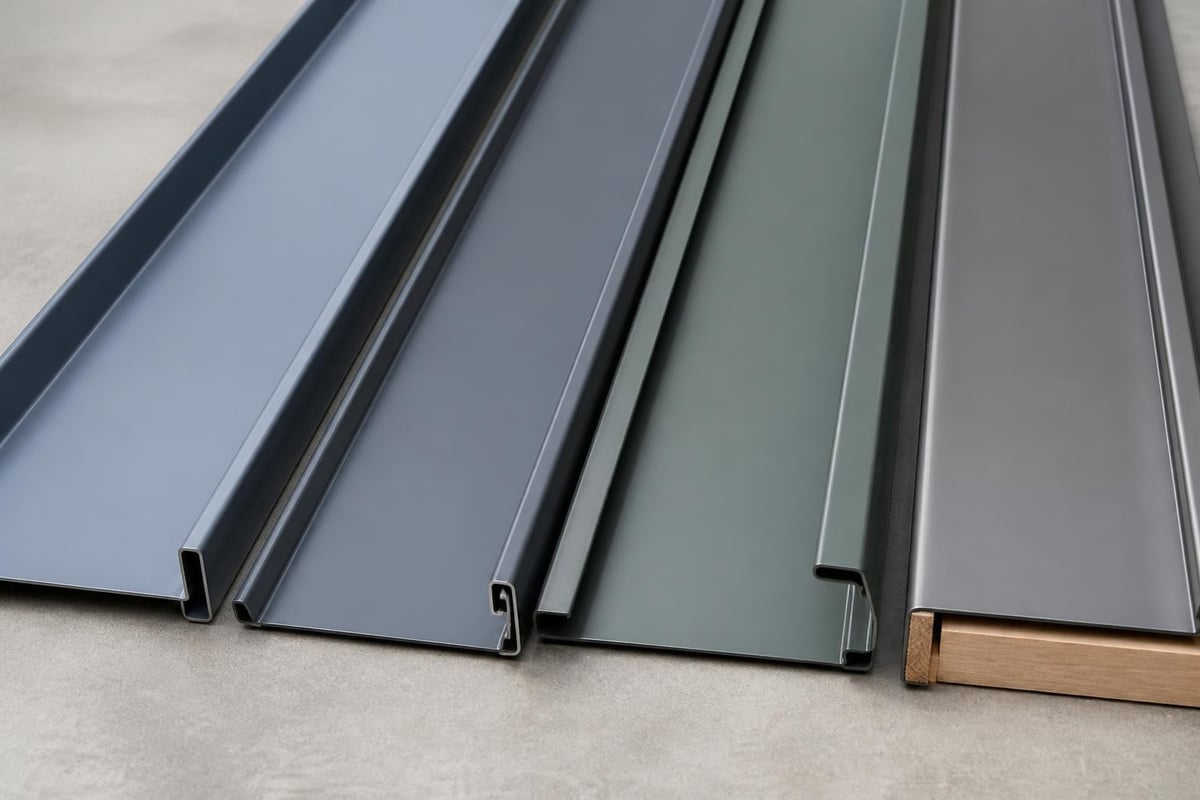
Common panel profiles include:
- Snap-lock panels with mechanical seaming
- Mechanical lock panels requiring specialized seaming tools
- Batten panel systems with separate cap over the seam
- Double-lock standing seam for maximum weather resistance
Panel widths typically range from 12 to 18 inches, with seam heights varying between one and three inches depending on aesthetic preferences and structural requirements. Material thickness generally falls between 24-gauge and 22-gauge steel, though aluminum and copper options are available for specific applications.
The Metal Construction Association provides comprehensive installation training covering various panel types and attachment methods. Their technical resources help contractors understand the nuances between system types and application requirements.
Pre-Installation Planning and Roof Deck Preparation
Successful standing seam metal roof installation begins long before the first panel arrives on site. Thorough preparation prevents costly callbacks and ensures optimal system performance.
Structural Assessment
Roof framing must support the metal panel system plus anticipated snow loads, wind uplift forces, and maintenance traffic. Engineers should verify that purlins, rafters, or roof trusses meet spacing requirements specified by the panel manufacturer. Most systems require support spacing between 24 and 60 inches on center.
Deck substrates vary by building type. Residential applications typically use plywood or oriented strand board (OSB) sheathing, while commercial structures may employ open purlin systems or structural metal decking. Each substrate type demands specific attachment protocols.
Underlayment Selection
High-temperature synthetic underlayment is essential beneath metal roofing systems. Standard asphalt-saturated felt can degrade from thermal cycling and moisture trapped between the underlayment and metal panels. Modern synthetic products withstand higher temperatures and provide superior tear resistance during installation.
| Underlayment Type | Temperature Rating | Permeability | Best Application |
|---|---|---|---|
| Synthetic non-breathable | Up to 250°F | Very low | Standard applications |
| High-temp breathable | Up to 280°F | Moderate | Ventilated assemblies |
| Self-adhered membrane | Up to 240°F | Very low | Ice dam/critical areas |
Apply underlayment horizontally from eave to ridge with minimum four-inch side laps and six-inch end laps. Secure with cap nails or staples according to wind zone requirements, avoiding over-fastening that creates panel attachment challenges.
Panel Layout and Clip Installation Methods
Proper panel layout ensures aesthetic consistency and structural performance across the roof plane. Standing seam metal roof installation requires meticulous attention to panel orientation, clip placement, and thermal movement accommodation.
Establishing Panel Run Directions
Panels should run perpendicular to eave and ridge lines, with seams parallel to the roof slope. On complex roof geometries, plan panel transitions at valleys, hips, and ridges to minimize custom fabrication while maintaining weather integrity.
Starting edge location matters significantly. Most installers begin at the side opposite prevailing weather patterns, ensuring seam overlaps shed water effectively. Mark panel centerlines on the underlayment using chalk lines to maintain alignment throughout installation.
Clip Types and Spacing Requirements
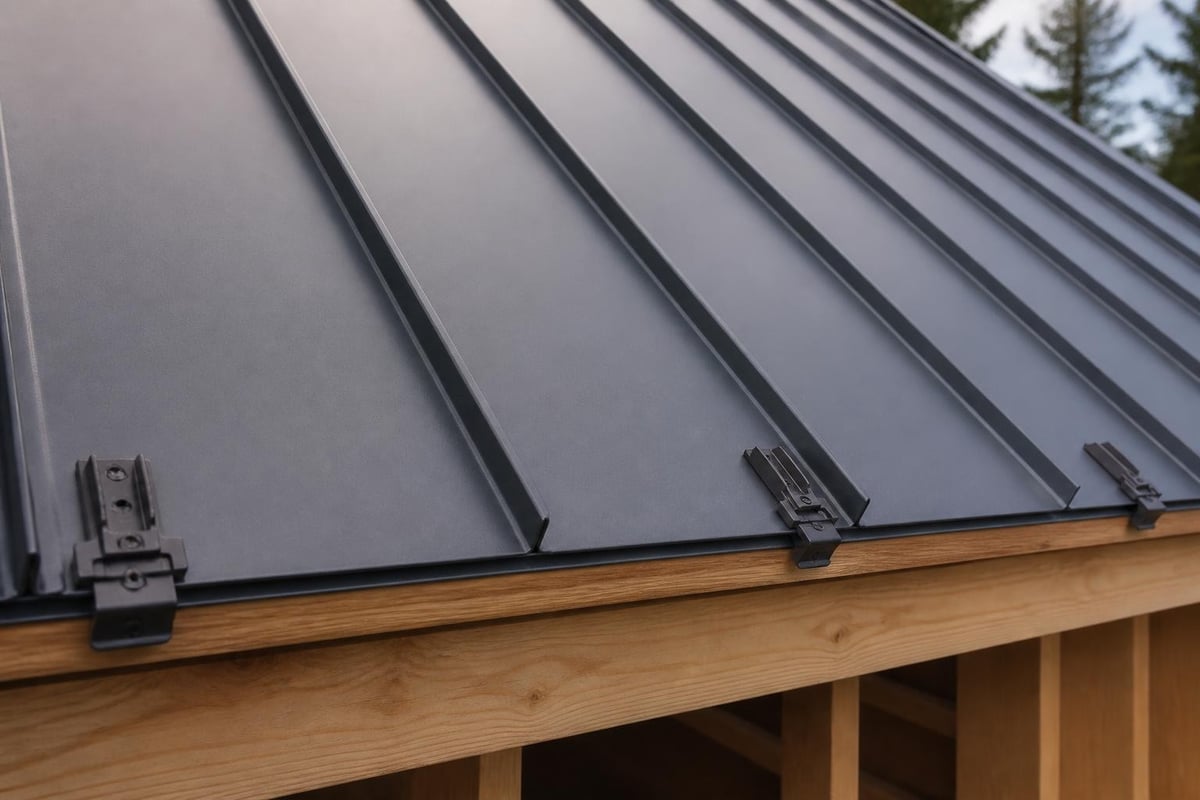
Fixed and sliding clips serve distinct purposes in standing seam systems. Fixed clips anchor panels at specific locations while sliding clips accommodate thermal expansion and contraction. The NRCA Roofing Manual provides detailed guidance on clip selection and installation patterns for various roof slopes and panel types.
Critical clip installation parameters:
- Spacing typically ranges from 12 to 18 inches on center
- Fixed clips required at gables, ridges, and panel terminations
- Sliding clips along panel runs to prevent oil-canning and buckling
- Minimum two clips per panel width at each structural support
Fasten clips to structural decking using appropriate fasteners. Wood substrates require ribbed pancake-head screws, while metal decking demands self-drilling/self-tapping screws with adequate pull-out resistance. Every fastener must achieve full compression without over-driving that crushes substrates or bends clips.
Panel Installation Sequence and Alignment
The physical installation of metal panels demands systematic execution and continuous quality verification. Even minor alignment errors compound across large roof areas, creating visible irregularities and potential performance issues.
First Panel Placement
The starter panel establishes alignment for the entire roof section. Position it precisely parallel to the eave line with proper overhang, typically one to two inches beyond the drip edge. Secure the panel through clips, verifying it remains straight and properly seated before proceeding.
Check panel alignment every three to five panels using string lines stretched from eave to ridge. Correct minor deviations immediately, as attempting adjustments after seaming becomes difficult or impossible.
Progressive Panel Installation
- Set the next panel adjacent to the installed panel
- Engage the male leg into the female seam of the previous panel
- Verify the panel seats fully along its entire length
- Attach clips to structural supports following the established pattern
- Hand-crimp or mechanically seam the interlock before moving forward
Maintain consistent panel overlap at end laps, typically six inches minimum. Seal end laps with high-grade butyl or silicone sealant approved by the panel manufacturer. Some applications require riveting or screwing through end laps for additional security in high-wind zones.
For those considering comprehensive roofing solutions, New Roof Installation services encompass metal roofing systems along with traditional materials. Professional installation teams bring specialized equipment and expertise necessary for standing seam metal roof installation projects of any scale.
Seaming Techniques and Quality Control
The standing seam itself represents the system's defining characteristic and primary weather barrier. Proper seaming technique directly impacts long-term performance and aesthetic quality.
Mechanical Seaming Tools
Professional-grade mechanical seamers create consistent, weathertight seams that meet manufacturer specifications. Two primary tool types dominate the industry:
Manual seamers require physical operation by the installer, rolling along the seam to progressively fold and compress the metal. These tools work well for smaller projects and detail work around penetrations.
Electric seamers provide faster, more consistent results on large roof areas. Battery-powered or corded models maintain uniform seaming pressure and speed, reducing installer fatigue and improving quality.
Regardless of tool type, verify proper seam formation by measuring seam height and checking for gaps or incomplete folds. The Metal Roofing Alliance’s installation resources detail acceptable seam profiles and common defects to avoid.
Seaming Best Practices
| Practice | Requirement | Consequence of Non-Compliance |
|---|---|---|
| Seam height consistency | ±1/8 inch variation | Visual irregularities, potential leaks |
| Complete fold engagement | 100% panel leg capture | Water infiltration, panel separation |
| Avoid over-seaming | Single pass for snap-lock | Metal fatigue, seam splitting |
| Weather protection | No seaming in precipitation | Moisture trapped in seam |
Never seam panels during rain or when panels have standing water. Moisture trapped within seams can cause corrosion and premature system failure. Temperature also matters; most manufacturers prohibit seaming when ambient temperatures fall below 20°F, as metal becomes brittle and prone to cracking.
Flashing Details and Penetration Management
Standing seam metal roof installation demands exceptional attention to transition details where the metal roofing system meets other building elements. These vulnerable areas require custom flashing and careful sequencing.
Ridge and Hip Cap Installation
Ridge caps shed water from both roof planes while accommodating panel thermal movement. Install continuous ridge vents when roof design requires attic ventilation, integrating them with the cap system. Hip caps follow similar principles but must account for compound angles.
Secure caps using clips or concealed fasteners that permit thermal movement. Avoid direct fastening through cap peaks, which creates leak-prone penetrations. Seal cap end dams and terminations with high-quality sealants compatible with metal panel coatings.
Eave and Gable Trim
Eave trim, or drip edge, directs water into gutters while providing a finished appearance. Install it over underlayment but beneath the first course of panels. Gable trim protects panel edges and prevents wind-driven moisture infiltration.
Both trim types should extend minimum two inches up the roof deck and feature hemmed edges for rigidity. Overlap sections minimum four inches and seal joints in high-wind coastal areas like Los Angeles where wind-driven rain poses elevated risks.
Roof Penetration Flashing
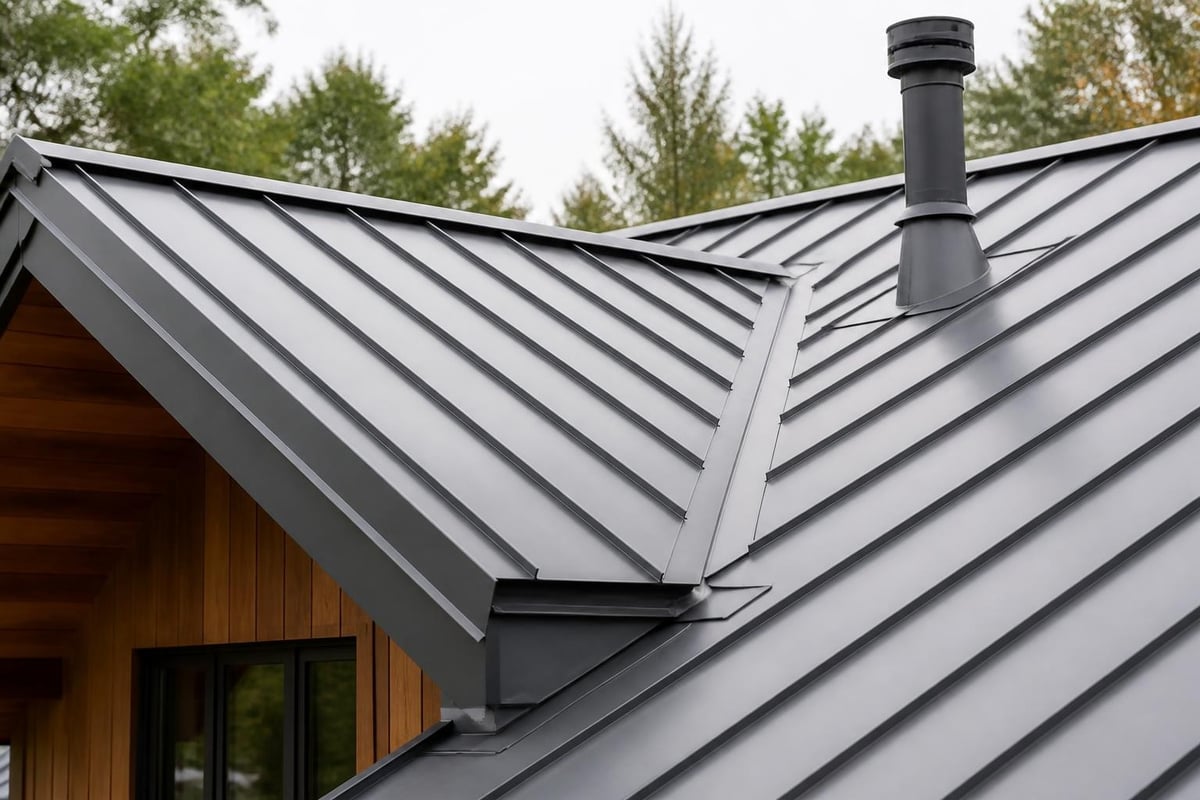
Pipe jacks, vent hoods, and equipment curbs interrupt the continuous metal roof plane. Each penetration requires individual assessment and custom flashing solutions. Standing seam metal roof installation around penetrations follows these principles:
- Position penetrations between panel seams whenever possible
- Use factory-manufactured boots for standard pipe sizes
- Create stepped flashing for penetrations spanning multiple panels
- Maintain minimum six inches between penetration edges and seams
- Apply appropriate sealants to all flashing interfaces
The Building America Solution Center recommends specific flashing details for metal roofing systems, including minimum clearances and material compatibility requirements that prevent galvanic corrosion.
Thermal Movement and Fastener Considerations
Metal panels expand and contract significantly with temperature fluctuations. Los Angeles experiences temperature swings from cool marine layers to intense summer heat, creating substantial thermal cycling that standing seam systems must accommodate.
Calculating Thermal Movement
Steel panels expand approximately 0.0000065 inches per inch per degree Fahrenheit. A 30-foot panel experiencing a 100°F temperature change will expand or contract nearly 0.25 inches. Aluminum moves almost twice as much as steel, requiring even greater accommodation.
Panel manufacturers provide thermal movement charts specifying required clip spacing and panel attachment methods. Following these specifications prevents oil-canning, fastener failure, and seam distortion.
Proper Fastener Selection
Fastener choice impacts system longevity and performance. Incompatible metals create galvanic cells that accelerate corrosion. Use stainless steel fasteners with Galvalume or aluminum panels, and properly coated fasteners with painted steel systems.
Fastener requirements by substrate:
- Wood decking: #10 or #12 ribbed pancake-head screws, minimum 1.5-inch penetration
- Metal decking: #12 or #14 self-drilling screws with EPDM or neoprene washers
- Concrete or masonry: Expansion anchors or powder-actuated fasteners
Verify that every fastener achieves proper torque. Under-driven fasteners lack adequate holding power, while over-driven fasteners damage substrates and create stress concentrations that initiate failure.
Coating Systems and Finish Considerations
Metal panel finish selection affects both aesthetics and performance. Factory-applied coatings protect base metal from corrosion while providing color and reflectivity characteristics that impact energy efficiency.
Common Coating Types
Kynar 500/Hylar 5000 (PVDF) coatings dominate premium applications, offering superior fade resistance and chalk retention over 30-plus year lifecycles. These fluoropolymer systems cost more initially but maintain appearance longer than alternative coatings.
Polyester and silicon-modified polyester (SMP) coatings provide mid-range performance at lower cost. They work well for commercial applications where budget constraints exist and moderate fade over 15-20 years is acceptable.
The Cool Roof Rating Council catalogs reflectance and thermal emittance values for metal roofing products. High-reflectance finishes reduce cooling loads in warm climates, potentially qualifying for energy-efficiency incentives and meeting increasingly stringent building codes.
| Coating Type | Expected Life | Chalk Resistance | Color Retention | Typical Warranty |
|---|---|---|---|---|
| PVDF (Kynar 500) | 30+ years | Excellent | Excellent | 25-30 years |
| SMP | 20-25 years | Good | Good | 20-25 years |
| Polyester | 15-20 years | Fair | Fair | 10-15 years |
Slope Requirements and Water Management
Roof slope directly impacts standing seam metal roof installation requirements and system performance. While metal roofing can perform on slopes as low as 0.25:12 with appropriate details, most residential applications feature slopes between 3:12 and 12:12.
Minimum Slope Considerations
Lower slopes demand more rigorous installation protocols. Sealant becomes mandatory in seams on roofs below 3:12, and some manufacturers require double-locked seams rather than snap-lock profiles. Underlayment must be fully adhered or use peel-and-stick membranes to prevent water migration.
Slopes below 1:12 require standing seam systems specifically engineered for low-slope applications, often incorporating structural sealants, continuous clips, and enhanced panel interlocks. The Metal Building Manufacturers Association design guides address these specialized applications with detailed structural and weatherproofing requirements.
Valley and Drainage Details
Valleys concentrate water flow, creating high-stress locations requiring reinforced details. Open valleys use separate metal flashing between roof planes, while closed valleys allow panels to run through the valley with special seaming attention.
Design valley flashing minimum 24 inches wide with hemmed edges for rigidity. Install ice-and-water barrier minimum three feet up from valley centerline on each side. In regions experiencing heavy rainfall, increase valley width and ensure adequate pitch to prevent backup during extreme weather events.
Safety Protocols and Installation Standards
Standing seam metal roof installation presents specific safety challenges. Smooth metal surfaces become extremely slippery when wet, and sharp panel edges pose cut hazards. Professional contractors implement comprehensive safety programs addressing these risks.
Fall Protection Requirements
OSHA mandates fall protection for work above six feet. Metal roofing contractors typically employ guardrail systems, personal fall arrest equipment, or safety monitoring systems depending on roof configuration and slope.
Anchor points for personal fall arrest must withstand 5,000 pounds per attached worker. Verify roof structure can support temporary anchor systems, or install permanent anchors during construction. Never attach fall protection to metal panels, clips, or trim components.
Tool and Material Safety
Sharp metal edges require cut-resistant gloves and careful handling procedures. Power seamers pose pinch-point hazards requiring proper guards and operator training. Store panels flat on stable surfaces to prevent wind displacement, and use appropriate lifting equipment for panels exceeding manageable weight.
Establish material staging areas that prevent panels from sliding on sloped roofs. Bundle panels securely and avoid over-stacking, which can bend lower panels and damage factory finishes.
Quality Verification and Post-Installation Inspection
Comprehensive inspection ensures standing seam metal roof installation meets specifications and performs as intended. Conduct inspections progressively during installation and upon completion.
During-Installation Checkpoints
- Verify clip spacing and fastener patterns every 10 panels
- Check seam engagement and height consistency continuously
- Confirm panel alignment against string lines
- Test sealant application at penetrations and end laps
- Inspect flashing integration at transitions
Document any deviations from specifications immediately and implement corrections before proceeding. Photographic documentation provides valuable records for quality assurance and warranty purposes.
Final Inspection Criteria
Walk the entire roof surface examining seams, fasteners, flashing details, and panel finish. Look for loose clips, incomplete seams, damaged coating, standing water, or any installation defects. Address deficiencies before demobilizing equipment and crew.
Test drainage by observing water flow during rain or using hose testing at critical areas. Water should shed cleanly from panels into gutters without backing up at seams or ponding in low spots.
Long-Term Performance and Maintenance Requirements
Properly installed standing seam metal roofing requires minimal maintenance but benefits from periodic inspection and care. Establishing maintenance protocols extends system life and preserves appearance.
Routine Inspection Schedule
Inspect roofs annually and after severe weather events. Look for loose fasteners, damaged panels, sealant degradation, and debris accumulation. Remove leaves, branches, and dirt that trap moisture against metal surfaces.
Pay special attention to sealant joints around penetrations and at panel terminations. Sealants typically last 10-20 years before requiring replacement. Reapply sealant proactively rather than waiting for visible leaks.
Panel Cleaning and Finish Care
Accumulated dirt and pollutants degrade coating appearance and performance. Wash panels every two to three years using mild detergent and low-pressure water. Avoid abrasive cleaners or high-pressure washing that damages factory finishes.
Touch up minor scratches or coating damage promptly using manufacturer-approved repair paint. Exposed base metal oxidizes quickly, especially in coastal environments, so address finish damage within weeks rather than months.
Standing seam metal roof installation combines technical precision, quality materials, and professional expertise to create roofing systems that protect buildings for decades with minimal maintenance. By following manufacturer specifications, industry best practices, and proper safety protocols, contractors deliver installations that meet performance expectations and satisfy property owners. Whether you're planning a residential roof replacement or a commercial roofing project in Los Angeles or surrounding areas, Proof Your Roof brings the specialized knowledge and experience necessary to execute flawless metal roofing installations that enhance property value and provide lasting protection.